Focusly : an app to help you stay Focused
Jun 13, 2022
🎯 About the project
In mid-April, I was having trouble staying focused during my work sessions. To stay focused, I tried listening to various types of music/sounds, such as lo-fi and ambient noise. But this didn't work since I was using YouTube as my streaming platform (which was a significant source of distraction).
I needed a web app that would allow me to listen to ambient noise while avoiding all distractions. As a result, I decided to build one over the weekend and titled it Focusly.
In this article, I am going to share with you how I built Focusly.
My plan:
- Goal 1: a minimal looking app with list of ambient noise sounds named Focus mode✔️
- Goal 2: add feature for meditation named Meditation mode✔️
🛠️ Building the app
Prerequisites
In order to build the app, I needed to collect ambient noise audio. After some googling, I found free versions of the sounds. To make the app look more appealing and user-friendly I decided to add icons, so I made a collection of them as well.
Design
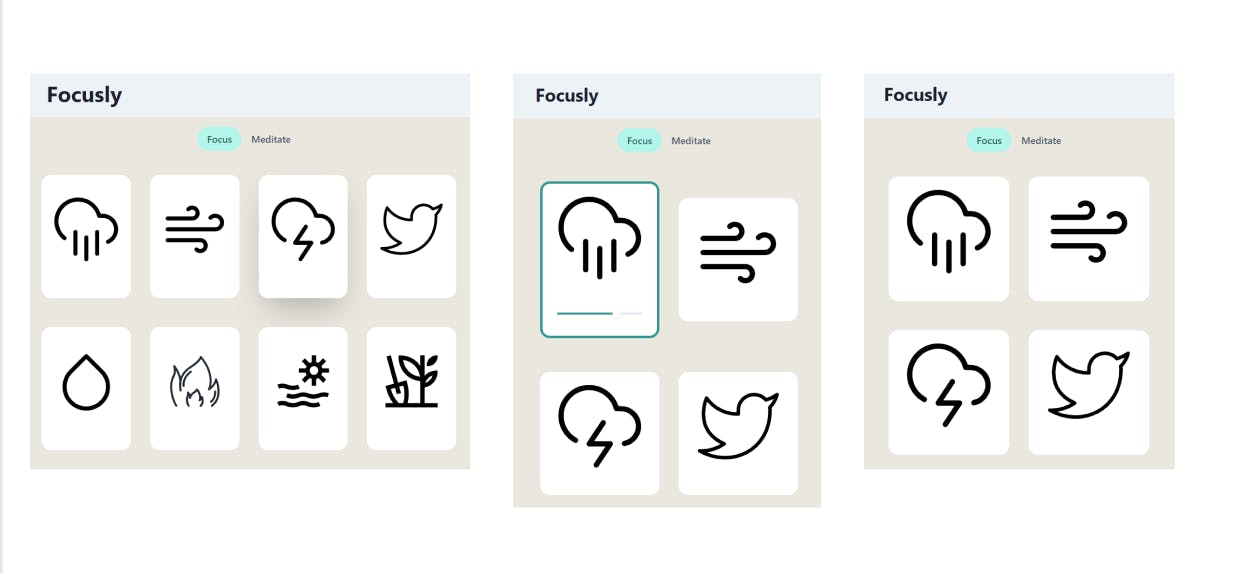
I wanted it to look aesthetic and minimal. I created the following design after taking inspiration from this on Pinterest.

Tech Stack
- ReactJS
- Chakra UI
- React Router v6
- react-sound
- Deployed with Vercel
Implementation
I started with creating the homepage where all the cards would be shown when the page loads.
I created an array of objects named info where a particular object contained id, image and sound resources. After this, I only had to send the following data to the card component for which I used the map() function.
COPY
COPY
function Homepage() {
  const info = [
    {
      id: "1",
      image: "./image/rain.svg",
      sound: "./sound/rain.mp3",
    },
    {
      id: "2",
      image: "./image/wind.svg",
      sound: "./sound/wind.mp3",
    },
];

  return (
    <Container maxW={"100%"} bg={"#E9E7DE"}>
      <Tabs />
      <Box maxW={"100%"}>
        <Center>
          <SimpleGrid columns={[1, 2, 4]}>
            {info && info.map((post) => <Card key={post.id} {...post} />)}
          </SimpleGrid>
        </Center>
      </Box>
    </Container>
  );
}
Then I worked on the Card component. I used react-sound to play audio files.
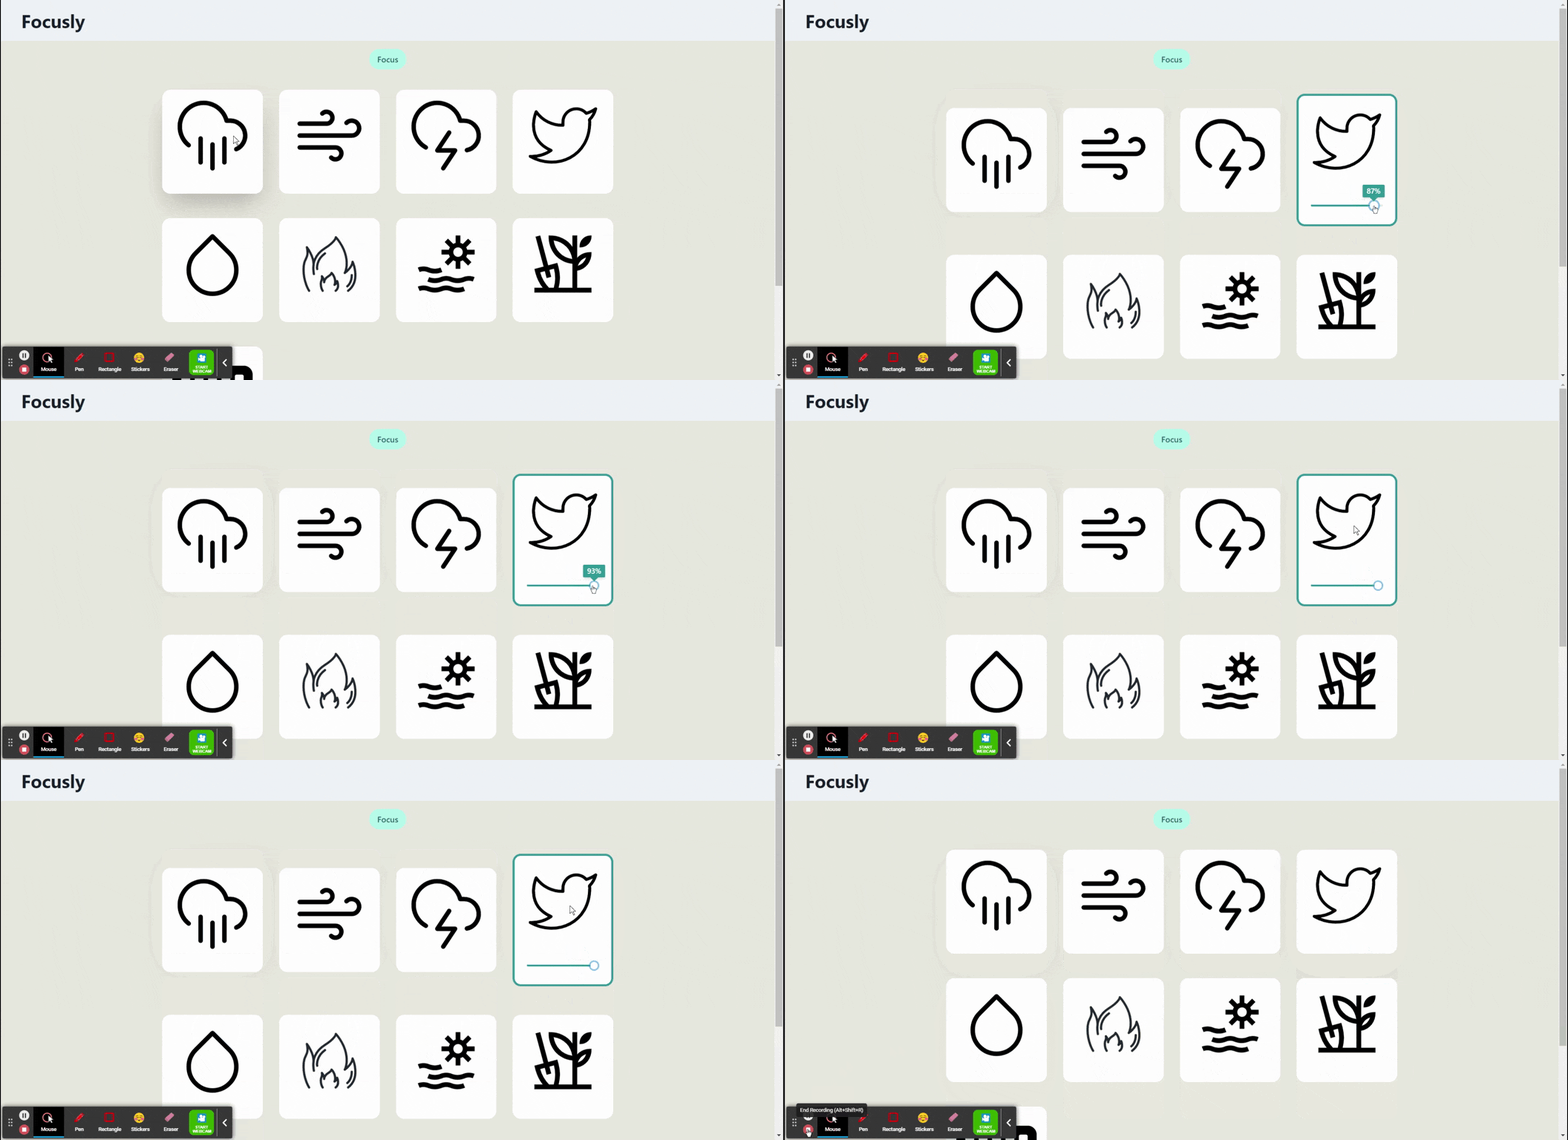
According to the plan, the card should contain a icon denoting the sound and a slider to control the sound level.
The card should function in the following way :
- When a user clicks on the card then if the card is already in active state stop the playing sound and don't display the slider.
COPY
COPY
function Card(props) {
  const [play, setPlay] = useState(false);
  const [volume, setVolume] = useState(70);
  const [sliderValue, setSliderValue] = useState(70);
  const [showTooltip, setShowTooltip] = useState(false);

  const clicked = (e) => {
    setPlay(!play);
  };

  if (!play) {
    return (
      <Suspense fallback={renderLoader}>
        <Center py={6} px={4}>
          <Box
            maxW={"320px"}
            border="0.5px"
            borderRadius={"2xl"}
            w="full"
            bg={"white"}
            p={6}
            overflow={"hidden"}
            _hover={{
              boxShadow: "2xl",
            }}
          >
            <Box
              h={"180px"}
              bg={"white.500"}
              mt={-6}
              mx={-6}
              pos={"relative"}
              onClick={clicked}
            >
              <Image
                p="20px"
                alt="image"
                w={"full"}
                h={"full"}
                src={props.image}
              />
              <Sound
                url={props.sound}
                playStatus={play ? Sound.status.PLAYING : Sound.status.STOPPED}
              />
            </Box>
          </Box>
        </Center>
      </Suspense>
    );
  }
- and if the card is in inactive state then play the sound and display the slider.
COPY
COPY
else {
    return (
      <>
        <Center py={8} px={4}>
          <Box
            maxW={"320px"}
            w="full"
            bg={"white"}
            border={"4px"}
            borderRadius={"2xl"}
            borderColor={"teal.500"}
            p={6}
            overflow={"hidden"}
            _hover={{
              boxShadow: "3xl",
            }}
          >
            <Box
              h={"180px"}
              bg={"white.500"}
              mt={-6}
              mx={-6}
              mb={6}
              pos={"relative"}
              onClick={clicked}
            >
              <Image
                p="20px"
                alt="image"
                w="full"
                h={"full"}
                src={props.image}
              />
              <Sound
                url={props.sound}
                loop={true}
                volume={volume}
                playStatus={play ? Sound.status.PLAYING : Sound.status.STOPPED}
              />
            </Box>
            <Slider
              id="slider"
              defaultValue={70}
              min={0}
              max={100}
              colorScheme="teal"
              onChange={(v) => {
                setSliderValue(v);
                setVolume(v);
              }}
              onMouseEnter={() => setShowTooltip(true)}
              onMouseLeave={() => setShowTooltip(false)}
            >
              <SliderTrack>
                <SliderFilledTrack />
              </SliderTrack>
              <Tooltip
                hasArrow
                bg="teal.500"
                color="white"
                placement="top"
                isOpen={showTooltip}
                label={`${sliderValue}%`}
              >
                <SliderThumb />
              </Tooltip>
            </Slider>
          </Box>
        </Center>
      </>
    );
This was working the way I expected it to.

With this, I achieved my first goal of creating the focus mode page but I also wanted to add the meditation mode which would contain meditation sound cards.
For adding this functionality I made use of the card component and created a meditation mode page in the same way I created the focus mode page.
COPY
COPY
function Meditate() {
const info= [
    {
      id: "1",
      image: "./image/meditate3.png",
      sound: "./sound/meditation.mp3",
    },
    {
      id: "2",
      image: "./image/meditate_lotus.svg",
      sound: "./sound/meditate_mind.mp3",
    },
  ];

  return (
    <Container maxW={"100%"} bg={"#E9E7DE"}>
      <Tabs />
      <Box maxW={"100%"}>
        <Center>
          <SimpleGrid columns={[1, 2, 3]}>
            {info && info.map((post) => <Card key={post.id} {...post} />)}
          </SimpleGrid>
        </Center>
      </Box>
    </Container>
  );
}
To access both the modes I made use of Tabs from Chakra UI and used React Router for routing purposes.
COPY
COPY
function tabs() {
  return (
    <Center>
      <Box py={4}>
        <Tabs variant="soft-rounded" colorScheme="teal">
          <TabList>
            <Tab>
              <Link href="/">Focus</Link>
            </Tab>
            <Tab>
              <Link href="/Meditate">Meditate</Link>
            </Tab>
          </TabList>
        </Tabs>
      </Box>
    </Center>
  );
}
At this point, I was done working on the app and then I decided to create a logo for it using Canva and finally hosted the app on Vercel.

📙 My learnings from this project
I've built a few React projects before, but despite the app's simplicity, there were a few things that had me googling.
- react-sound: Previously I had never worked with audio in my react projects. In this project, I used react-sound to work with the audio files.
- Gitpod: I built about 60% of the app on my local windows laptop but it started showing various issues due to which I decided to use Gitpod ( also I really wanted to try it out ). I followed Gitpod's documentation to set the dev environment, installed the extension on chrome and I was good to go.
Working on this project turned out to be a great learning experience.
🔗 Links
👋 Thanks
Well, this is all for this one. I will keep on building cool stuff and sharing my learnings and experiences through my articles in the future✌️. If you liked this article then do check out my other articles here.
Feel free to connect with me on LinkedIn and Twitter and let me know your thoughts on this project.